So, Dreamweaver was a good editor, but if you have a big PHP project, you will need some more firepower. I decided to install Eclipse PDT a PHP IDE with the Zend Debugger. I used WAMP as my webserver and firefox as my external browser.
I haven't used it yet but I have a feeling it will help speed up development :)
Here are the steps:
Step 1] Download and install Eclipse PDT 1.0.3 (Release) (example: C:\Program Files\PDT\)
http://download.eclipse.org/tools/pdt/downloads/release.php?release=R20080603
Step 2] Download and install WAMP or any server with PHP.
http://www.wampserver.com/en/download.php
Step 3] Download and install Zend Debugger (put the ZendDebugger.dll in your C:\wamp\php\ folder)
http://downloads.zend.com/pdt/server-debugger/
Put the dummy.php in your PHP project's webroot.
Step 4] open up C:\wamp\php\php.ini
change: implicit_flush = Off to implicit_flush = On
change: output_buffering=4096 to output_buffering = Off
at the bottom append:
[Zend]
zend_extension_ts = "C:\wamp\php\ZendDebugger.dll"
zend_debugger.allow_hosts=127.0.0.1/32, 192.168.0.0/255.255.0.0
zend_debugger.expose_remotely=always
Step 5] Install Subclipse by opening PDT goto Help->Find and Install Updates(optional)
Add remote server with URL: http://subclipse.tigris.org/
--------- Extra steps to start debugging with firefox (optional, sorry its a little rough, but these are just general steps) ------------
Step 1] Start PDT, goto Window->Preferences->General->Web Browser, select use external web browser, select firefox
Step 2] Make a new project, make a new file called index.php, right click on the file, goto run as, open run as dialog.
Step 3] Point WAMP to the new project (ex: http://helloworld)
Step 4] Go back to PDT, under PHP Web Page, create new. Under Name: write in Test index.php. Under Server Bugger use: Zend Debugger. On PHP server, make a new one pointing to http://helloworld Under file, manually type in index.php. URL should be left at auto generate.
Step 5] Goto the common tab, check Debug and Run under 'display in favorites menu'. Click apply settings.
Step 6] Edit index.php to do something like echo 'hello world';
Step 7] At the top toolbar if you click the debug arrow you should see test index.php in your favorites, click it. Firefox should popup while PDT is connected to the zend debugger.
Wednesday, September 17, 2008
Wednesday, September 10, 2008
CakePHP 1.19 Test Suite testing with Session Component
Hello, you might be having a tough time doing some integration testing on your controllers which use the Session component. Here are is an example to help you get started:
This creates the model + components in your controller. The sessions should be working normally now.
Take at look at this to see how they did unit testing on the Session component itself for more ideas (https://trac.cakephp.org/browser/branches/1.2.x.x/cake/tests/cases/libs/session.test.php?rev=7246).
class Foo_ControllerTest extends UnitTestCase
{
 function test1()
 {

  $usersController = &new UsersController();
  $usersController->_initComponents();
  $usersController->constructClasses();
  $this->assertNotNull($usersController->Session);
  $usersController->Session->_checkValid();

 }
}
This creates the model + components in your controller. The sessions should be working normally now.
Take at look at this to see how they did unit testing on the Session component itself for more ideas (https://trac.cakephp.org/browser/branches/1.2.x.x/cake/tests/cases/libs/session.test.php?rev=7246).
Tuesday, September 9, 2008
cakephp 1.19 AppModel bug?
I've been using the $hasMany, $uses, etc properties in the AppModel to simply some of the querying operations. But it seems like sometimes it randomly deletes rows from some of the tables I've specified in the tables. Also, I don't always need to use those associations.
I've found that loading the model and using it as needed seemed like a better approach and it wasn't deleting data from tables mysteriously anymore..
To use another model only when you need it do something like this:
I've found that loading the model and using it as needed seemed like a better approach and it wasn't deleting data from tables mysteriously anymore..
To use another model only when you need it do something like this:
function amodelmethod()
{
   loadModel('FooModel');
   $fooModel = &new FooModel();
   $fooModel->fooMethod();
}
Monday, August 25, 2008
Remote Debugging Flash or Flex Apps using Flex IDE
Theres a lot of information about this already, just mentioning it one more time won't hurt:
1] Make sure your Flash app is compiled permitting debugging. If using Flex make sure its not the release compilation. Lets pretend the compiled program is uploaded to http://blah.com/flashapp/flashapp.html.
2] Create a new Flex project, you can name it anything.
3] Right click on the new project, goto Properties then Run/Debug Settings. Make a new configuration with the Debug/Profile/Run path pointing to the application you want to debug, in our case: http://blah.com/flashapp/flashapp.html.
4] Click Debug project. It will pop up the application you want to debug.
5] When the window pops up, right click the program. If you have Flash Debug Player installed, there will be a context menu item called Debugger. Click this.
6] Tell it you want to connect the debugger to localhost (which your Flex IDE started).
7] Done, you should be able to see trace statements :)
Wednesday, August 13, 2008
CakePHP 1.1 Unit Testing Test Suite v 1.0.0.5 tutorial
So your stuck with CakePHP 1.1, but you need to add Unit Testing, what do you do?
You can grab Cake Test Suite v1.0.0.5 (using SimpleTest) here
The thing with this Test Suite is that I couldn't find documentation anywhere so I decided to write this little tutorial on how to get started.
Step 1: Setup
First make sure your CakePHP Project's debug level is set to at least 1.
Next, after unzipping the app folder into your project and trying to run the test controller(http://yourproject/test/) you might see that you will get this error:
To fix this open up /app/webroot/test/index.php and insert this on line 82:
Step 2: Writing the Tests
Lets say for example, I have a model user.php that I want to test, I have to create this file as /app/tests/app/cases/models/User.test.php
It will look something like this:
If testing a controller, you would want to use the loadController method.
If I wanted to make a group test of my models I would for example make a file
in app/tests/app/groups/Model.group.php:
Hope this helps get you on the right track. Take a look at the simpletest docs for more information on how to unit test your project.
You can grab Cake Test Suite v1.0.0.5 (using SimpleTest) here
The thing with this Test Suite is that I couldn't find documentation anywhere so I decided to write this little tutorial on how to get started.
Step 1: Setup
First make sure your CakePHP Project's debug level is set to at least 1.
Next, after unzipping the app folder into your project and trying to run the test controller(http://yourproject/test/) you might see that you will get this error:
Notice: Use of undefined constant CORE_PATH - assumed 'CORE_PATH' in D:\Flex Workspaces\cakeamfphp\cake\config\paths.php on line 44
To fix this open up /app/webroot/test/index.php and insert this on line 82:
if (!defined('CORE_PATH')) {
 if (function_exists('ini_set')) {
  ini_set('include_path', CAKE_CORE_INCLUDE_PATH . PATH_SEPARATOR . ROOT . DS . APP_DIR . DS . PATH_SEPARATOR . ini_get('include_path'));
  define('APP_PATH', null);
  define('CORE_PATH', null);
 } else {
  define('APP_PATH', ROOT . DS . APP_DIR . DS);
  define('CORE_PATH', CAKE_CORE_INCLUDE_PATH . DS);
 }
}

require CORE_PATH.'cake'.DS.'bootstrap.php';
Step 2: Writing the Tests
Lets say for example, I have a model user.php that I want to test, I have to create this file as /app/tests/app/cases/models/User.test.php
It will look something like this:
class UserTest extends UnitTestCase {

 function testSomething() {
  loadModel('User');
  $user = &new User();
  $this->assertEqual($user->name, 'User');
 }
}

?>
If testing a controller, you would want to use the loadController method.
If I wanted to make a group test of my models I would for example make a file
in app/tests/app/groups/Model.group.php:
    require_once(TESTS.'/app/cases/models/User.test.php');
    require_once(TESTS.'/app/cases/models/User_Builder.test.php');

    class ModelTest extends GroupTest {

  function ModelTest(){
   $this->addTestCase(new UserTest());
   $this->addTestCase(new User_BuilderTest());
  }

 }

?>
Hope this helps get you on the right track. Take a look at the simpletest docs for more information on how to unit test your project.
Monday, August 11, 2008
Flex ArrayCollection CollectionEvent dispatching class changes
Lets say you have a class:
[ArrayElementType("com.my.AwesomeClass")]
private var myAC:ArrayCollection = new ArrayCollection();
your class is such that sometimes changing a property in AwesomeClass doesn't
make myAC dispatch CollectionEvent.COLLECTION_CHANGE. An example changing the
property awesomeClass.foo.x.
To tell myAC that an item is changed use ArrayCollection's itemUpdated method after changing an element in the ArrayCollection.
myAC.itemUpdated(awesomeClass);
Monday, August 4, 2008
Getting CakeAMFPHP w/ CakePHP 1.1 centralized database sessions working
CakePHP makes it a snap to create centralized database sessions.
However, If you wanted to use Flash and CakeAMFPHP with CakePHP's sessions, you'll find that it might not be working. Here are some fixes+workarounds to get it running.
Step 1] open /app/vendors/vendors/cakeamfphp/amf-core/app/Gateway.php
comment out line 93
The auth filter was breaking the sessions for some reason.
Step 2] Open /app/config/core.php
change the CAKE_SESSION_SAVE to:
change CAKE_SESSION_COOKIE to your php cookie sessions name(look in phpinfo()):
for example mine is:
change CAKE_SECURITY to low:
Step 3] create the sessions table in your $default(in database.php) database by importing the file at: /app/config/sql/sessions.sql
Step 4] open /cake/libs/session.php and comment out:
on line 132:
on line 311:
on line 541:
the useragent works with the browser but we are connecting using flash to amf to for some reason this was breaking.
You are done, try playing around with the Session methods to see if your
sessions are being stored and retrieved from the database. For a tutorial on CakePHP sessions take a look here.
---edit----
still having problems? Try turning off cookies in your cake gateway.
Open /app/webroot/cake_gateway.php:
insert this at the top:
open /cake/libs/session.php:
find all occurences of ini_set('session.use_trans_sid', 0);
and change them to
in your delegate when you call the gateway it must pass in a PHPSESSID example:
However, If you wanted to use Flash and CakeAMFPHP with CakePHP's sessions, you'll find that it might not be working. Here are some fixes+workarounds to get it running.
Step 1] open /app/vendors/vendors/cakeamfphp/amf-core/app/Gateway.php
comment out line 93
//$this->filters['auth'] = 'authenticationFilter';
The auth filter was breaking the sessions for some reason.
Step 2] Open /app/config/core.php
change the CAKE_SESSION_SAVE to:
define('CAKE_SESSION_SAVE', 'database');
change CAKE_SESSION_COOKIE to your php cookie sessions name(look in phpinfo()):
for example mine is:
define('CAKE_SESSION_COOKIE', 'PHPSESSID');
change CAKE_SECURITY to low:
define('CAKE_SECURITY', 'low');
Step 3] create the sessions table in your $default(in database.php) database by importing the file at: /app/config/sql/sessions.sql
Step 4] open /cake/libs/session.php and comment out:
on line 132:
  /*if (Configure::read('Session.checkAgent') === true) {
   if (env('HTTP_USER_AGENT') != null) {
    $this->_userAgent = md5(env('HTTP_USER_AGENT') . CAKE_SESSION_STRING);
   }
  }*/
on line 311:
if (/*Configure::read('Session.checkAgent') === false || $this->_userAgent == $this->read("Config.userAgent") && */$this->time <= $this->read("Config.time")) {
on line 541:
if (/*Configure::read('Session.checkAgent') === false || $this->_userAgent == $this->read("Config.userAgent") && */$this->time <= $this->read("Config.time")) {
the useragent works with the browser but we are connecting using flash to amf to for some reason this was breaking.
You are done, try playing around with the Session methods to see if your
sessions are being stored and retrieved from the database. For a tutorial on CakePHP sessions take a look here.
---edit----
still having problems? Try turning off cookies in your cake gateway.
Open /app/webroot/cake_gateway.php:
insert this at the top:
 ini_set('session.use_trans_sid', 1);  //make it so we can use cookie-less sessions
 ini_set('session.use_cookies', 0);
open /cake/libs/session.php:
find all occurences of ini_set('session.use_trans_sid', 0);
and change them to
ini_set('session.use_trans_sid', 1);
in your delegate when you call the gateway it must pass in a PHPSESSID example:
 //cookieless sessions
 if (session_id != null) {
  appendurl = '?PHPSESSID='+session_id;
 }

 var gateway:String="http://cakeamfphp/cake_gateway.php"+appendurl;
Tuesday, July 29, 2008
Fat Models
no not those models :P CakePHP models :)
If you find your self doing something like this in the controller:
consider putting this type of logic as a function in the model and then calling the function.
Better yet try not to use custom queries if you can and use the model's built in functions.
If you find your self doing something like this in the controller:
$this->A_Model->query("update somedatabase set idstatus = '".$idstatus."', statuslastmodified = '".time()."' where idproject = '".$idproject."' and UID= '".$UID."'");
consider putting this type of logic as a function in the model and then calling the function.
Better yet try not to use custom queries if you can and use the model's built in functions.
Tuesday, July 22, 2008
Flex MXML binding The entity name must immediately follow the '&' in the entity reference
So your trying to do some mxml binding with conditional logic like:
when you compile you get this error, "The entity name must immediately follow the '&' in the entity reference"
THe parser looks at the & and expects an entity reference because the &
signifies the start of an entity reference within XML. So how do we tell it that it's actually a condition-AND operator?
Replace each of the & '& a m p ;' <-- no spaces
Compile, and viola it works!
<mx:Button label="Sign In" enabled="{emailTextInput.text != '' && passwordTextInput.text != '' }" />
when you compile you get this error, "The entity name must immediately follow the '&' in the entity reference"
THe parser looks at the & and expects an entity reference because the &
signifies the start of an entity reference within XML. So how do we tell it that it's actually a condition-AND operator?
Replace each of the & '& a m p ;' <-- no spaces
Compile, and viola it works!
Wednesday, July 16, 2008
Flex: Is it a memory leak?
tutorial how flash garbage collection works:
http://blogs.adobe.com/aharui/GarbageCollection/GCAtomic.ppt
heres a couple good quotes from the presentation:
-The collector is not guaranteed to find all collectible blocks in one pass
Don’t want to interfere with rendering and interaction, Thus memory may never return to the initial point
-You are generally only concerned about repeatable sequences: Popup dialogs coming and going Modules loading and unloading. If you repeat these sequences often over a long period of time, the amount of totalMemory will hit some maximum value and stay at or below it if you are not leaking memory.
-Garbage Collection is not predictable
good tutorial on using the flex profiler:
http://www.peachpit.com/articles/article.aspx?p=1182473&seqNum=2
Tuesday, July 15, 2008
Flex Actionscript 3.0 Missing DisplayObject Children
So you have a component like
if you try to create your object with as3 like:
you'll see that
gives you null. Thats because your component's children are created using deferred instantiation. If you want to force the component to create its children do:
now when you try:
there will actually be something there :)
Awesome.mxml

<mx:Canvas ....>
   <mx:Vbox id="avbox" />
</mx:Canvas>
if you try to create your object with as3 like:
var awesome:Awesome = new Awesome();
you'll see that
trace(awesome.avbox); //NULL
gives you null. Thats because your component's children are created using deferred instantiation. If you want to force the component to create its children do:
awesome.initialize();
now when you try:
trace(awesome.avbox); //NOT NULL
there will actually be something there :)
Actionscript 3.0 Flex Modules Tricky Timer Memory Leak
Becareful when unloading modules to stop and remove Timers, these can cause you memory leaks (and headaches)!!
Friday, July 11, 2008
PureMVC Pipes disconnecting the pipes after a module is unloaded TeeSplit
because TeeSplit can't remove a pipefitting of our choosing I extended it
and added in this method:
in a PipeAwareModule you can add a reference to the pipes connecting to it.
if your module has a unload method you'd want to:
1] call facade.removeMediator on every mediator (in the junction mediator's onRemove method do junction.removePipe on all pipefittings attached to that junction), facade.removeProxy, ..etc
2] call the removepipes() to remove incoming pipes, then
3] call facade.removeCore to get rid of all the core actors.
and added in this method:
        public function removePipeFitting(inpipe:IPipeFitting):IPipeFitting {
         var outputsac:ArrayCollection = new ArrayCollection(outputs);

         if (outputsac.getItemIndex(inpipe) >= 0) {
          return outputsac.removeItemAt(outputsac.getItemIndex(inpipe)) as IPipeFitting;
         }
         return null;

        }
in a PipeAwareModule you can add a reference to the pipes connecting to it.
  private var _cachedPipes:ArrayCollection = new ArrayCollection([]);


  /**
   * used to remove pipes at the shell's side of the junction
   *
   * @param pipefitting we are going to call disconnect on this pipefitting
   * @param output
   *
   */
  public function cacheFitting(pipefitting:IPipeFitting, output:IPipeFitting):void {
   _cachedPipes.addItem({pipefitting:pipefitting, output:output});
  }

  /**
   * goes through the arraycollection disconnecting the pipefitting from output
   *
   */
  public function removepipes():void {
   for each (var pipefittings:Object in _cachedPipes) {
    if (pipefittings.pipefitting is TeeSplitImproved) {
     (pipefittings.pipefitting as TeeSplitImproved).removePipeFitting(pipefittings.output);
    }
    else {
     (pipefittings.pipefitting as IPipeFitting).disconnect();
    }
   }
   _cachedPipes.removeAll();
  }
if your module has a unload method you'd want to:
1] call facade.removeMediator on every mediator (in the junction mediator's onRemove method do junction.removePipe on all pipefittings attached to that junction), facade.removeProxy, ..etc
2] call the removepipes() to remove incoming pipes, then
3] call facade.removeCore to get rid of all the core actors.
PureMVC Pipes Connecting / Disconnecting Pipes TeeMerge
===pipe1========= teemerge ---------------
                     |
======pipe2==========|
To get something like above you could either do
pipe1.connect(teemerge);
pipe2.connect(teemerge);
OR equivalently
teemerge.connectInput(pipe1);
teemerge.connectInput(pipe2);
disconnecting pipes
lets say we had:
======pipe1========pipe2==========pipe3=========

doing:
pipe1.disconnect().disconnect().disconnect();


would result in:


=====pipe1        pipe          pipe3

because each disconnect returns the disconnected pipe
===teesplit==============pipe1=====
              |
              |==========pipe2=====
              |
              |==========pipe3=====


in this case

teesplit.disconnect();
teesplit.disconnect();
teesplit.disconnect();

removes all 3 pipes in the reverse order that you connected them.


there is no built in capability to remove a pipe of your choosing at the moment(something you need if your gonna be doing a lot of module building!!).

check here to see how someone implemented it themself:
http://forums.puremvc.org/index.php?action=printpage;topic=508.0
Thursday, July 10, 2008
PureMVC Pipes - using the filter
The filter is useful for filtering the messages going through the pipes. An analogy you can use is a water filter.
in code form this would look like this:
the way something gets filtered is this..
1] the message going through the filter must have a variable in the message header,
lets call it particleSize:int.
example:
2] the filter also needs a paramater to compare wether to let the message through or not, lets call it maxParticleSize.
3] then the filter needs a filter function which checks if the maxParticleSize >= particleSize.
How to setup the filter
to make it do something we have to create the filter and pass in parameters to the constructor.
One way to create the filter is to pass in all name, output, filter and params to the functions parameters:
above, messages enter input the teeMerge, then goes to the filter, if the filter
accepts the message, it sends it to the pipelistener.
If you look at the Filter constructor you can see output, filter and params are optional and can be set/modified after creation of the filter which I will explain how that works below.
setting the output
setting the log level/filter function
If you look at Filter's source, its write method is where the filter changes it's log level and filter function. When the filter sees a FilterControlMessage.SET_PARAMS it will then try to set the new params.
below I set the maxParticleSize to 10 because i want the mineral to go through:
of course, you can send the FilterControlMessage through a modules junction to the
filter using junction.sendMessage as well.
wall ======== [water filter] ========= fridge/sink
       pipe1                    pipe2
in code form this would look like this:
              // create output pipes 1
               var pipe1:IPipeFitting = new Pipe();
               var pipe2:IPipeFitting = new Pipe();

              // create filter
               var filter:Filter = new Filter( 'TestFilter' );

               // connect input fitting
               var connectedInput:Boolean     = pipe1.connect( filter );

               // connect output fitting
               var connectedOutput:Boolean = filter.connect( pipe2 );
the way something gets filtered is this..
1] the message going through the filter must have a variable in the message header,
lets call it particleSize:int.
example:
 var h20Message:IPipeMessage = new Message( Message.NORMAL, { particleSize:1, name:'h20'} );
 var mineralMessage:IPipeMessage = new Message( Message.NORMAL, { particleSize:10, name:'mineral'} );
2] the filter also needs a paramater to compare wether to let the message through or not, lets call it maxParticleSize.
3] then the filter needs a filter function which checks if the maxParticleSize >= particleSize.
How to setup the filter
to make it do something we have to create the filter and pass in parameters to the constructor.
        /**
         * Constructor.
         *
         * Optionally connect the output and set the parameters.
         */
        public function Filter( name:String, output:IPipeFitting=null, filter:Function=null, params:Object=null )
        {
            super( output );
            this.name = name;
            if ( filter != null ) setFilter( filter );
            if ( params != null ) setParams( params );
        }
One way to create the filter is to pass in all name, output, filter and params to the functions parameters:
var teeMerge:TeeMerge = new TeeMerge();
var filter:Filter = new Filter( 'waterFilter',
                                new PipeListener(this,function ( message:IPipeMessage ){trace('particle got through');),
                                function( message:IPipeMessage, params:Object ):void { if (message.getHeader().particleSize >= params.maxParticleSize) throw new Error('particle filtered'); },
                                { maxParticleSize:5 }
                              );
teeMerge.connect(filter);
junction.registerPipe( PipeAwareModule.STDIN, Junction.INPUT, teeMerge );
above, messages enter input the teeMerge, then goes to the filter, if the filter
accepts the message, it sends it to the pipelistener.
If you look at the Filter constructor you can see output, filter and params are optional and can be set/modified after creation of the filter which I will explain how that works below.
setting the output
filter.connect(a IPipeFitting)setting the log level/filter function
If you look at Filter's source, its write method is where the filter changes it's log level and filter function. When the filter sees a FilterControlMessage.SET_PARAMS it will then try to set the new params.
below I set the maxParticleSize to 10 because i want the mineral to go through:
var maxParticleSize:number = 10;
var setLogLevelMessage:LogFilterMessage = new LogFilterMessage(FilterControlMessage.SET_PARAMS, particleSize);
filter.write(setLogLevelMessage );
of course, you can send the FilterControlMessage through a modules junction to the
filter using junction.sendMessage as well.
Wednesday, July 9, 2008
Adding a Resize button to a Flex Panel v2
check out this guys resizable panel: http://www.aboutflex.net/flex/resizable-panel/
Its pretty cool, but it won't work if you try to add the panel inside another component. Thats because handleScale directly references the stage to get the mouse coordinates. But if your component does not start at x=0 y=0 then the cordinates will be off.
here is the modified version which uses the parents mouseX,mouseY in handleScale:
heres the source:
ResizablePanelv2.mxml
./com/flexas3/containers/ResizablePanel.as
Its pretty cool, but it won't work if you try to add the panel inside another component. Thats because handleScale directly references the stage to get the mouse coordinates. But if your component does not start at x=0 y=0 then the cordinates will be off.
here is the modified version which uses the parents mouseX,mouseY in handleScale:
heres the source:
ResizablePanelv2.mxml
<?xml version="1.0" encoding="utf-8"?>
<mx:Application xmlns:mx="http://www.adobe.com/2006/mxml" layout="absolute" xmlns:containers="com.flexas3.containers.*">
 <mx:VBox horizontalAlign="center" verticalAlign="middle" backgroundColor="#696969" horizontalCenter="0" verticalCenter="0" width="50%" height="75%">
  <mx:Button label="I'm in a Vbox" />
  <containers:ResizablePanel title="Resize Me !!" x="73" y="110" width="258" height="213" />
 </mx:VBox>
</mx:Application>
./com/flexas3/containers/ResizablePanel.as
package com.flexas3.containers
{
 import flash.events.MouseEvent;

 import mx.containers.Panel;
 import mx.controls.Button;

 public class ResizablePanel extends Panel
 {
  public function ResizablePanel()
  {
   super();
   resizer.addEventListener(MouseEvent.MOUSE_DOWN,handleDown)
  }
  private var resizer:Button=new Button();

  override protected function createChildren():void{
   this.resizer.width=12;
            this.resizer.height=12;

   super.createChildren();
   this.rawChildren.addChild(resizer);
  }
  override protected function updateDisplayList(unscaledWidth:Number, unscaledHeight:Number):void{
   super.updateDisplayList(unscaledWidth,unscaledHeight);
   this.resizer.y = unscaledHeight - resizer.height ;
            this.resizer.x = unscaledWidth - resizer.width ;

  }
  private function handleDown(e:MouseEvent):void{
   stage.addEventListener(MouseEvent.MOUSE_MOVE,handleScale)
   stage.addEventListener(MouseEvent.MOUSE_UP,stopResize)
  }
  private function handleScale(e:MouseEvent):void{
      if(parent.mouseX-this.x>50)
       width=parent.mouseX-this.x;
      if(parent.mouseY-this.y>50)
       height=parent.mouseY-this.y;
  }
  private function stopResize(e:MouseEvent):void{
   stage.removeEventListener(MouseEvent.MOUSE_MOVE,handleScale)
   stage.removeEventListener(MouseEvent.MOUSE_UP,stopResize)
  }
 }

}
Thursday, June 26, 2008
PureMVC Pipeworks Singleton vs Multiple-Instance Modules
Sometimes you only want one instance of a module created. We'll call this type of module a singleton module.
Sometimes you might want to be able to create multiple instances of a module. We'll just call this a multiple-instance module.
Take a look at the Pipeworks demo and note how the app uses the LoggerModule and PrattlerModule.
We see there is only one instance of LoggerModule for the whole app, but we can create many instances of the PrattlerModule.
First, here is the link to the Pipeworks source.
Below are the differences between singleton and multiple-instance modules:
LoggerModule - a singleton module
-LoggerModule constructor uses LoggerModule.NAME (static String) as LoggerModule.ApplicationFacade's multiton key
-LoggerModuleMediator uses LoggerModuleMediator.NAME (static String) as Shell.Mediator's name
-LoggerModuleMediator registered, pipes connected on application startup
PrattlerModule - a multiple-instance module
-PrattlerModule constructor uses PrattlerModule.moduleID (unique ID created from auto-incrementing static counter) as PrattlerModule.ApplicationFacade's multiton key
-PrattlerModuleMediator uses PrattlerModule.getID() as Shell.Mediator's name
-PrattlerModuleMediator registered using a command, pipes connected inside command.
Below are the pertinent functions PrattleModule used to generate and retrieve moduleID:
public function getID():String
{
return moduleID;
}
private static function getNextID():String
{
return NAME + '/' + serial++;
}
private static var serial:Number = 0;
private var moduleID:String = PrattlerModule.getNextID();
Tuesday, June 24, 2008
How to Install CakeAMFPHP
Introduction
CAKEPHP
Are you trying to create an enterprise Flex app? You'll be needing to do some heavy lifting serverside. Chances are, you'll be needing some help... thats where CakePHP comes in. If you've programmed in PHP before, you've probably heard of CakePHP, a rapid development PHP framework. Using CakePHP allows us to stay MVC oriented, resulting in code with better readability and objects with looser coupling. Scalability. Baby!
AMFPHP
If you've ever tried to send data back and forth between flash and php chances are you've used AMFPHP. With AMFPHP you can do stuff like for example sending in custom value objects(public var fooGuy:UserVO) to your PHP script and back. This means less work, no converting objects to arrays and arrays back to objects.
CAKEAMFPHP
Wanna combine the best of both worlds? This is where CakeAMFPHP comes in. I'll be telling you have to install CakeAMFPHP with CakePHP 1.1 in this post.
Installation
Step 1.
Grab the latest CakePHP here: http://cakeforge.org/frs/download.php/591/cake_1.1.19.6305.tar.bz2
Step 2.
Extract this anywhere you'd like.
The directory structure should look like:
cake_1.1.19.6305/app
cake_1.1.19.6305/cake
cake_1.1.19.6305/docs
cake_1.1.19.6305/vendors
Step 3.
Grab the latest CakeAMFPHP here: http://cakeforge.org/frs/download.php/267/cakeamfphp.0.6.0.tar.bz2
Step 4.
Unzip CakeAMFPHP into a temporary directory.
The directory structure should look like:
cakeamfphp/webroot
cakeamfphp/views
cakeamfphp/vendors
Step 5.
Next cut and paste the webroot, views, and vendors directories into cakePHP's app folder (cake_1.1.19.6305/app). You are doing it right if cakeamfphp/webroot matches with cake_1.1.19.6305/app/webroot.
Step 6.
Configure your cakePHP installation (/app/config/core.php).
----------------------
the amfbrowser is located in the amfbrowser directory. If localhost points to your cakeAMFPHP project then http://localhost/amfbrowser will point you to the amfbrowser.
Now that the files are in place, take a look at amfBB for examples of how to use the cake_gateway.php to invoke cakePHP's controller methods.
You might notice that cakeAMFPHP break's cakePHP's session component. Next time, I'll teach you how to get cakePHP's sessions working with cakeAMFPHP :P
Monday, June 23, 2008
Getting into PureMVC Pipes
 Pipes is a utility written for PureMVC multi-core that allows application module communication and/or module module communication.
Before Pipes, communicating from application to module meant defining interfaces and directly accessing modules (through references). But in a PureMVC application implementing the Pipe utility, we communicate by sending 'messages' via the pipe system. A Message carries its type and also a payload object. Messages behave similarly to events in that the recipient of the message is not strongly tied to the sender of the message. The benefit should be clear that Pipes allows our application and modules to be further decoupled.
The Basics

The Pipes utility works off the plumbing metaphor. Take a toilet for example. A toilet has a pipe connecting to it that supplies water (input). There is also another pipe leaving the toilet that moves out waste (output). Please note that stuff in pipes are only intended to move in one direction. For example, you wouldn't want waste to come back from the sewers into your toilet! Yuck!
To hook up your application/module with pipes. You need to create whats called a Junction. A Junction is like a hole you just drilled into your app/module, now we can connect some pipes to it! In a PureMVC application, we use whats called a JunctionMediator. A JunctionMediator is just a Mediator that contains an instance of a Junction. It works just like any other mediator in that it can list and handle notification interests. Remember, you have to create a JunctionMediator for both application AND all of your modules.
With the Junction in place, we can now connect Pipes to it! A Pipe is the most basic element in this system. A Pipe's goal is simple, it passes stuff from one end(input) out through the other end (output).
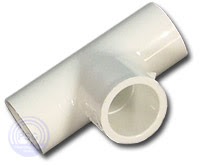
Plumbers call this a 'Tee'
Sometimes you need a pipe to 'split' to different destinations. For example, a main water pipe connects to your house. The pipe then splits off to your kitchen sink, bathroom sink, toilet, shower, garden hose, etc. To do this in our application, we use whats called a 'TeeSplit.' A TeeSplit sends a message from its input pipe down every output pipe that is connected to it. If you have an instance of TeeSplit and 3 Pipes and you do: Pipe1.connect(aTeeSplit), aTeeSplit.connect(Pipe2), and aTeeSplit.connect(Pipe3).
Stuff from Pipe1 flows into both Pipe2 and Pipe3.
Othertimes we need several pipes to 'merge' into one pipe. For example, there may be several toilets throughout the house, but all the waste pipes merge into one main waste pipe that leaves the house and flows to the local sewer system. To do this in our application, we use whats called a 'TeeMerge.' A TeeMerge will take messages sent from its input pipes and send it down its output pipe. If you have an instance of TeeMerge and 3 Pipes and you do: Pipe1.connect(aTeeMerge), aTeeMerge.connectInput(Pipe2), and aTeeMerge.connectInput(Pipe3). Stuff from both Pipe2 and Pipe3 flow into Pipe1.
Step 1: Making the Application Pipable
Create a JunctionMediator for your application
// ./mainapp/view/ApplicationJunctionMediator.as
public class ApplicationJunctionMediator extends JunctionMediator
{
  //Constructor, create a Junction instance
  public function ApplicationJunctionMediator()
  {
    super(NAME, new Junction());
  }

  //After the facade registers this mediator, lets attach some pipe fittings
  override public function onRegister():void {
    //Attach a TeeSplit to the junction for broadcasting messages
    junction.registerPipe('output', Junction.OUTPUT, new TeeSplit());

    //Attach a TeeMerge to the junction for receiving messages
    junction.registerPipe('input', Junction.INPUT, new TeeMerge());

    //Add a listener, to listen for messages entering the Junction
    junction.addPipeListener('input', this, handlePipeMessage);

    //give the application junction to mymodulemediator so we can connect the pipes
    sendNotification(ApplicationFacade.CONNECT_APP_TO_MYMODULE, junction );
  }

  //this function handles any messages the Junction recieves
  override public function handlePipeMessage( message:IPipeMessage ):void
  {
     trace('App got message: ', message.message);
  }


}
Step 2: Making a Module Pipable
Create a JunctionMediator for your module
// ./mymodule/view/MyModuleJunctionMediator.as
public class MyModuleJunctionMediator extends JunctionMediator
{
  //Constructor, create a Junction instance
  public function MyModuleJunctionMediator()
  {
    super(NAME, new Junction());
  }

  //After the facade registers this mediator, lets attach some pipe fittings
  override public function onRegister():void {
    //Add a listener, to listen for messages entering the Junction
    junction.addPipeListener('input', this, handlePipeMessage);
  }

  //this function handles any messages the Junction recieves
  override public function handlePipeMessage( message:IPipeMessage ):void
  {
     trace('MyModule got message: ', message.message);
  }

}
Step 3: Creating the Module and Connecting the Pipes
To use a module in your application, you need to create a mediator that instantiates and holds an instance of that module. This mediator is also responsible for connecting the Pipes after the application and module have finished instantiating.
// ./mainapp/view/MyModuleMediator.as
public class MyModuleMediator extends Mediator
{
    //Constructor, create a instance of MyModule
    public function MyModuleMediator()
    {
     super(NAME, new MyModule());
    }

    override public function handleNotification( note:INotification ):void
    {
        switch( note.getName() )
        {
            case  ApplicationFacade.CONNECT_APP_TO_MYMODULE:

                // The junction was passed from ApplicationJunctionMediator
                var junction:Junction = note.getBody() as Junction;

                // Connect the apps's teesplit(output) to mymodule's junction
                var ateesplit:TeeSplit = junction.retrievePipe('output') as TeeSplit;
                var apipe:IPipeFitting = new Pipe();
                ateesplit.connect(apipe);
                mymodule.acceptInputPipe('input', apipe);

                // Connect a new output pipe from mymodule's junction to app's teemerge
                var mymoduleToApp:Pipe = new Pipe();
                var ateemerge:TeeMerge = junction.retrievePipe('input') as TeeMerge;
                ateemerge.connectInput(mymoduleToApp);
                mymodule.acceptOutputPipe('output', mymoduleToApp);

            break;
        }
    }
    private function get mymodule:MyModule { return viewComponent as MyModule; }

}
Step 4: Sending a Message down the Pipes
To send a Message down the pipes, you use the Junction's sendMessage function.
For example, if I wanted to send a message from the application to MyModule. I would in ApplicationJunctionMediator, do:
junction.sendMessage('output', new Message(Message.NORMAL, null, 'hellofromapp'));
MyModuleJunctionMediator would get the message, and its method handlePipeMessage invoked would be invoked. The result should be a trace 'MyModule got message: hellofromapp'.
In this example, the message payload was only a String. If you want you can pass any object as the payload.
More Resources
This was a very basic explaination of Pipes. Pipes also has filtering and queueing features which I won't discuss here. For more information please take a look at the following:
Nice tutorial on Pipes: http://www.joshuaostrom.com/2008/06/15/understanding-puremvc-pipes/
Take a look at Pipe's unit tests to get a better understanding of what each class is trying to accomplish:
http://trac.puremvc.org/Utility_AS3_MultiCore_Pipes_UnitTests
Check out Pipeworks example's source code to see Pipes in action:
http://trac.puremvc.org/Demo_AS3_MultiCore_Flex_PipeWorks
Subscribe to:
Posts (Atom)