 Pipes is a utility written for PureMVC multi-core that allows application module communication and/or module module communication.
Before Pipes, communicating from application to module meant defining interfaces and directly accessing modules (through references). But in a PureMVC application implementing the Pipe utility, we communicate by sending 'messages' via the pipe system. A Message carries its type and also a payload object. Messages behave similarly to events in that the recipient of the message is not strongly tied to the sender of the message. The benefit should be clear that Pipes allows our application and modules to be further decoupled.
The Basics

The Pipes utility works off the plumbing metaphor. Take a toilet for example. A toilet has a pipe connecting to it that supplies water (input). There is also another pipe leaving the toilet that moves out waste (output). Please note that stuff in pipes are only intended to move in one direction. For example, you wouldn't want waste to come back from the sewers into your toilet! Yuck!
To hook up your application/module with pipes. You need to create whats called a Junction. A Junction is like a hole you just drilled into your app/module, now we can connect some pipes to it! In a PureMVC application, we use whats called a JunctionMediator. A JunctionMediator is just a Mediator that contains an instance of a Junction. It works just like any other mediator in that it can list and handle notification interests. Remember, you have to create a JunctionMediator for both application AND all of your modules.
With the Junction in place, we can now connect Pipes to it! A Pipe is the most basic element in this system. A Pipe's goal is simple, it passes stuff from one end(input) out through the other end (output).

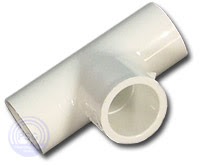
Sometimes you need a pipe to 'split' to different destinations. For example, a main water pipe connects to your house. The pipe then splits off to your kitchen sink, bathroom sink, toilet, shower, garden hose, etc. To do this in our application, we use whats called a 'TeeSplit.' A TeeSplit sends a message from its input pipe down every output pipe that is connected to it. If you have an instance of TeeSplit and 3 Pipes and you do: Pipe1.connect(aTeeSplit), aTeeSplit.connect(Pipe2), and aTeeSplit.connect(Pipe3).
Stuff from Pipe1 flows into both Pipe2 and Pipe3.
Othertimes we need several pipes to 'merge' into one pipe. For example, there may be several toilets throughout the house, but all the waste pipes merge into one main waste pipe that leaves the house and flows to the local sewer system. To do this in our application, we use whats called a 'TeeMerge.' A TeeMerge will take messages sent from its input pipes and send it down its output pipe. If you have an instance of TeeMerge and 3 Pipes and you do: Pipe1.connect(aTeeMerge), aTeeMerge.connectInput(Pipe2), and aTeeMerge.connectInput(Pipe3). Stuff from both Pipe2 and Pipe3 flow into Pipe1.
Step 1: Making the Application Pipable
Create a JunctionMediator for your application
// ./mainapp/view/ApplicationJunctionMediator.as
public class ApplicationJunctionMediator extends JunctionMediator
{
  //Constructor, create a Junction instance
  public function ApplicationJunctionMediator()
  {
    super(NAME, new Junction());
  }

  //After the facade registers this mediator, lets attach some pipe fittings
  override public function onRegister():void {
    //Attach a TeeSplit to the junction for broadcasting messages
    junction.registerPipe('output', Junction.OUTPUT, new TeeSplit());

    //Attach a TeeMerge to the junction for receiving messages
    junction.registerPipe('input', Junction.INPUT, new TeeMerge());

    //Add a listener, to listen for messages entering the Junction
    junction.addPipeListener('input', this, handlePipeMessage);

    //give the application junction to mymodulemediator so we can connect the pipes
    sendNotification(ApplicationFacade.CONNECT_APP_TO_MYMODULE, junction );
  }

  //this function handles any messages the Junction recieves
  override public function handlePipeMessage( message:IPipeMessage ):void
  {
     trace('App got message: ', message.message);
  }


}
Step 2: Making a Module Pipable
Create a JunctionMediator for your module
// ./mymodule/view/MyModuleJunctionMediator.as
public class MyModuleJunctionMediator extends JunctionMediator
{
  //Constructor, create a Junction instance
  public function MyModuleJunctionMediator()
  {
    super(NAME, new Junction());
  }

  //After the facade registers this mediator, lets attach some pipe fittings
  override public function onRegister():void {
    //Add a listener, to listen for messages entering the Junction
    junction.addPipeListener('input', this, handlePipeMessage);
  }

  //this function handles any messages the Junction recieves
  override public function handlePipeMessage( message:IPipeMessage ):void
  {
     trace('MyModule got message: ', message.message);
  }

}
Step 3: Creating the Module and Connecting the Pipes
To use a module in your application, you need to create a mediator that instantiates and holds an instance of that module. This mediator is also responsible for connecting the Pipes after the application and module have finished instantiating.
// ./mainapp/view/MyModuleMediator.as
public class MyModuleMediator extends Mediator
{
    //Constructor, create a instance of MyModule
    public function MyModuleMediator()
    {
     super(NAME, new MyModule());
    }

    override public function handleNotification( note:INotification ):void
    {
        switch( note.getName() )
        {
            case  ApplicationFacade.CONNECT_APP_TO_MYMODULE:

                // The junction was passed from ApplicationJunctionMediator
                var junction:Junction = note.getBody() as Junction;

                // Connect the apps's teesplit(output) to mymodule's junction
                var ateesplit:TeeSplit = junction.retrievePipe('output') as TeeSplit;
                var apipe:IPipeFitting = new Pipe();
                ateesplit.connect(apipe);
                mymodule.acceptInputPipe('input', apipe);

                // Connect a new output pipe from mymodule's junction to app's teemerge
                var mymoduleToApp:Pipe = new Pipe();
                var ateemerge:TeeMerge = junction.retrievePipe('input') as TeeMerge;
                ateemerge.connectInput(mymoduleToApp);
                mymodule.acceptOutputPipe('output', mymoduleToApp);

            break;
        }
    }
    private function get mymodule:MyModule { return viewComponent as MyModule; }

}
Step 4: Sending a Message down the Pipes
To send a Message down the pipes, you use the Junction's sendMessage function.
For example, if I wanted to send a message from the application to MyModule. I would in ApplicationJunctionMediator, do:
junction.sendMessage('output', new Message(Message.NORMAL, null, 'hellofromapp'));
MyModuleJunctionMediator would get the message, and its method handlePipeMessage invoked would be invoked. The result should be a trace 'MyModule got message: hellofromapp'.
In this example, the message payload was only a String. If you want you can pass any object as the payload.
More Resources
This was a very basic explaination of Pipes. Pipes also has filtering and queueing features which I won't discuss here. For more information please take a look at the following:
Nice tutorial on Pipes: http://www.joshuaostrom.com/2008/06/15/understanding-puremvc-pipes/
Take a look at Pipe's unit tests to get a better understanding of what each class is trying to accomplish:
http://trac.puremvc.org/Utility_AS3_MultiCore_Pipes_UnitTests
Check out Pipeworks example's source code to see Pipes in action:
http://trac.puremvc.org/Demo_AS3_MultiCore_Flex_PipeWorks
2 comments:
Hi,
very cool tutorial!!
you said: "Before Pipes, communicating from application to module meant defining interfaces and directly accessing modules (through references)."
The same thing is for modules to modules communication, is it true?
Is there a tutorial that explains module to module communication with pureMVC?
Thanks in advance
Regards
Lorenzo
Hell
Thank for your very simple tutorial!
Post a Comment